Burnishing Pads

Limestone Floor Renovation Codsall

Limestone Floor Installation Clean and Polish for Codsall Builder

A builder got in touch with me about aLimestone tiled floor he had installed for a client in Codsall near Wolverhampton. He was doing some renovation work on the property and clearly stone floors were not his speciality. The tiles had been sealed incorrectly and then covered up which had left marks in the stone. To his credit he did attempt to make good the issues, but ultimately got into a mess with it and decided to call us in to rectify.

Limestone Floor Before Cleaning Codsall Limestone Floor Before Cleaning Codsall

I went along to survey the floor and work out a plan to rectify the issues and as part of this conducted a few tests. The testing went well and it confirmed to me which products and methods would work best on the floor, it also demonstrated that the Limestone floor could be renovated to a good standard. Luckily, I had a spare couple of days so I could do the job quickly, so the builder was very relieved, and the client pleased it was going to be resolved.

Limestone Floor Before Cleaning Codsall

Cleaning a Limestone Tiled Hallway Floor

The firstly job was to strip the floor of the sealer and give it a deep clean. To do this I applied a strong dilution of Tile Doctor Remove and Go to the floor, left it to dwell and then went over the floor with a Black pad fitted to a rotary machine. The soiling generated was then rinsed off the floor with water and extracted with a wet vacuum.

After this I started burnishing the stone tiles with a 400-grit diamond pad covering each tile at least three times; the floor was then rinsed and the soiling extracted with the wet vacuum as before. I purposely worked on the floor in two sections so it didn’t dry out and leave a chalky finish, especially in the grout as this can be difficult to remove when dry. I then moved on to the 800-grit pad and then a 1500-grit pad using the same method. I also used smaller 6-inch pads around the edges and corners where the rotary machine could not reach using a hand polisher.

After rinsing and drying off with three air movers, I asked the client to have a think overnight if they wanted to leave it at the 1500-grit finish or go up to a 3000-grit very fine finish. My concern was that an adjoining room which wasn’t being cleaned wasn’t that high a finish and the two floors would look different.

Sealing a Limestone Tiled Hallway Floor

I returned the next day and checked the moisture readings of the floor using a damp meter, the readings were good confirming the floor was dry and ready to be sealed. Having thought about it overnight the client agreed with my concern and was happy to leave it at a 1500 grit finish.

To seal the Limestone floor, I applied two coats of Tile Doctor Ultra Seal which is a penetrating sealer that soaks into the pores of the stone to provide maximum protection and leaves a natural finish. Additionally, this sealer is particularly good in a high traffic area such as the hallway.

Limestone Floor After Renovation Codsall

My client was delighted with the transformed floor and was now happy which was a relief to the builder who was keen to get the job signed off. For aftercare cleaning I left the client a bottle of Tile Doctor Stone Soap which will allow them to keep the tiles clean and help to keep the polished patina finish.

Limestone Floor After Renovation Codsall


Professional Renovation of a Limestone Tiled Hallway in Birmingham

Limestone Floor Installation Clean and Polish for Codsall Builder Read More »

Terrazzo Tiled Kitchen Floor Renovation Pattingham

1950’s Terrazzo Kitchen Floor Tiles Renovated in Pattingham Wolverhampton

This Terrazzo tiled floor in the kitchen of a property in Pattingham was laid in the 1950’s and had become dull over time. The otherwise modern looking kitchen was being let down by the dull floor and the client now wanted it cleaned and polished to lift its appearance.

Terrazzo Tiled Kitchen Floor Pattingham Before Cleaning

The country village of Pattingham is directly West of Wolverhampton and a thirty-minute drive from my base in Bilston. Happy to help I spoke to the owners over the phone and arranged a time to pop over and survey the floor.

After visiting the property, I could see that the Terrazzo tile and grout needed a thorough deep clean and then sealed to bring back the natural colour of the tiles and ensure they were protected in the future. I gave them a price for the work which they were happy to accept, and we arranged a suitable time to start the work.

Terrazzo Tiled Kitchen Floor Pattingham Before Cleaning Terrazzo Tiled Kitchen Floor Pattingham Before Cleaning

Cleaning a Terrazzo Tiled Kitchen Floor

To start the cleaning, I sprayed a strong dilution of Tile Doctor Remove & Go onto the floor and left it to soak for ten minutes and start breaking down the contaminants. The floor was then scrubbed using a Black pad fitted to a rotary buffer machine which loosens the dirt and brings it to the surface.

The floor was then rinsed with an Airflex Pro machine which applies water to the floor at high pressure and then extracts the waste using a powerful vacuum. This helps dislodge the soiling and ensures mess is kept to a minimum. Once this was done, I checked the floor for any stubborn areas that needed further work and repeated the process as required until I was satisfied the floor was as clean as possible.

I then moved on to burnishing the floor which is the best way to bring up the polish on stone-based flooring. This is done using a set of diamond encrusted burnishing pads fitted to the rotary machine with added weights to increase the traction. 400, 800 and 1500 grit burnishing pads were applied in sequence rinsing and extracting after every pad. These pads further clean the Terrazzo and buildup a natural sheen.

The corners and edges were done by hand with a handheld polisher fitted with smaller 6-inch version of the pads. After giving the floor a final rinse and extraction, it was left to dry with the aid of several air movers.

Sealing a Terrazzo Tiled Kitchen Floor

I returned the next and went over the floor with a very fine 3000-grit burnishing pad, this tightened the pores in the stone and deepens the natural sheen appearance. This final pad is applied dry with only a little water sprayed onto the floor and once done it leaves the floor ready to be sealed.

The sealer chosen was Tile Doctor Colour Grow which works by occupying the pores in the floor thereby preventing dirt from becoming ingrained there. It’s also fully breathable which is an important consideration when sealing old floors like this and it contains a colour enhancer that improves the look if the tile. Three coats of sealer were applied and then when dry it was buffed to a shine with a White pad.

Terrazzo Tiled Kitchen Floor Pattingham After Cleaning

For aftercare I left the client with a complimentary bottle of Tile Doctor pH Neutral Cleaner to help maintain the floors appearance. It’s a mild but effective tile cleaner for use on sealed floors, many products you find in supermarkets are simply too strong for use on a sealed floor and will reduce the life of the sealer.

Terrazzo Tiled Kitchen Floor Pattingham After Cleaning Terrazzo Tiled Kitchen Floor Pattingham After Cleaning


Professional Restoration of a Terrazzo Tiled Kitchen Floor in Birmingham

1950’s Terrazzo Kitchen Floor Tiles Renovated in Pattingham Wolverhampton Read More »

Travertine Tiled Floor Renovation Wolverhapton

Travertine Kitchen Floor Cleaned and Polished in Wolverhampton

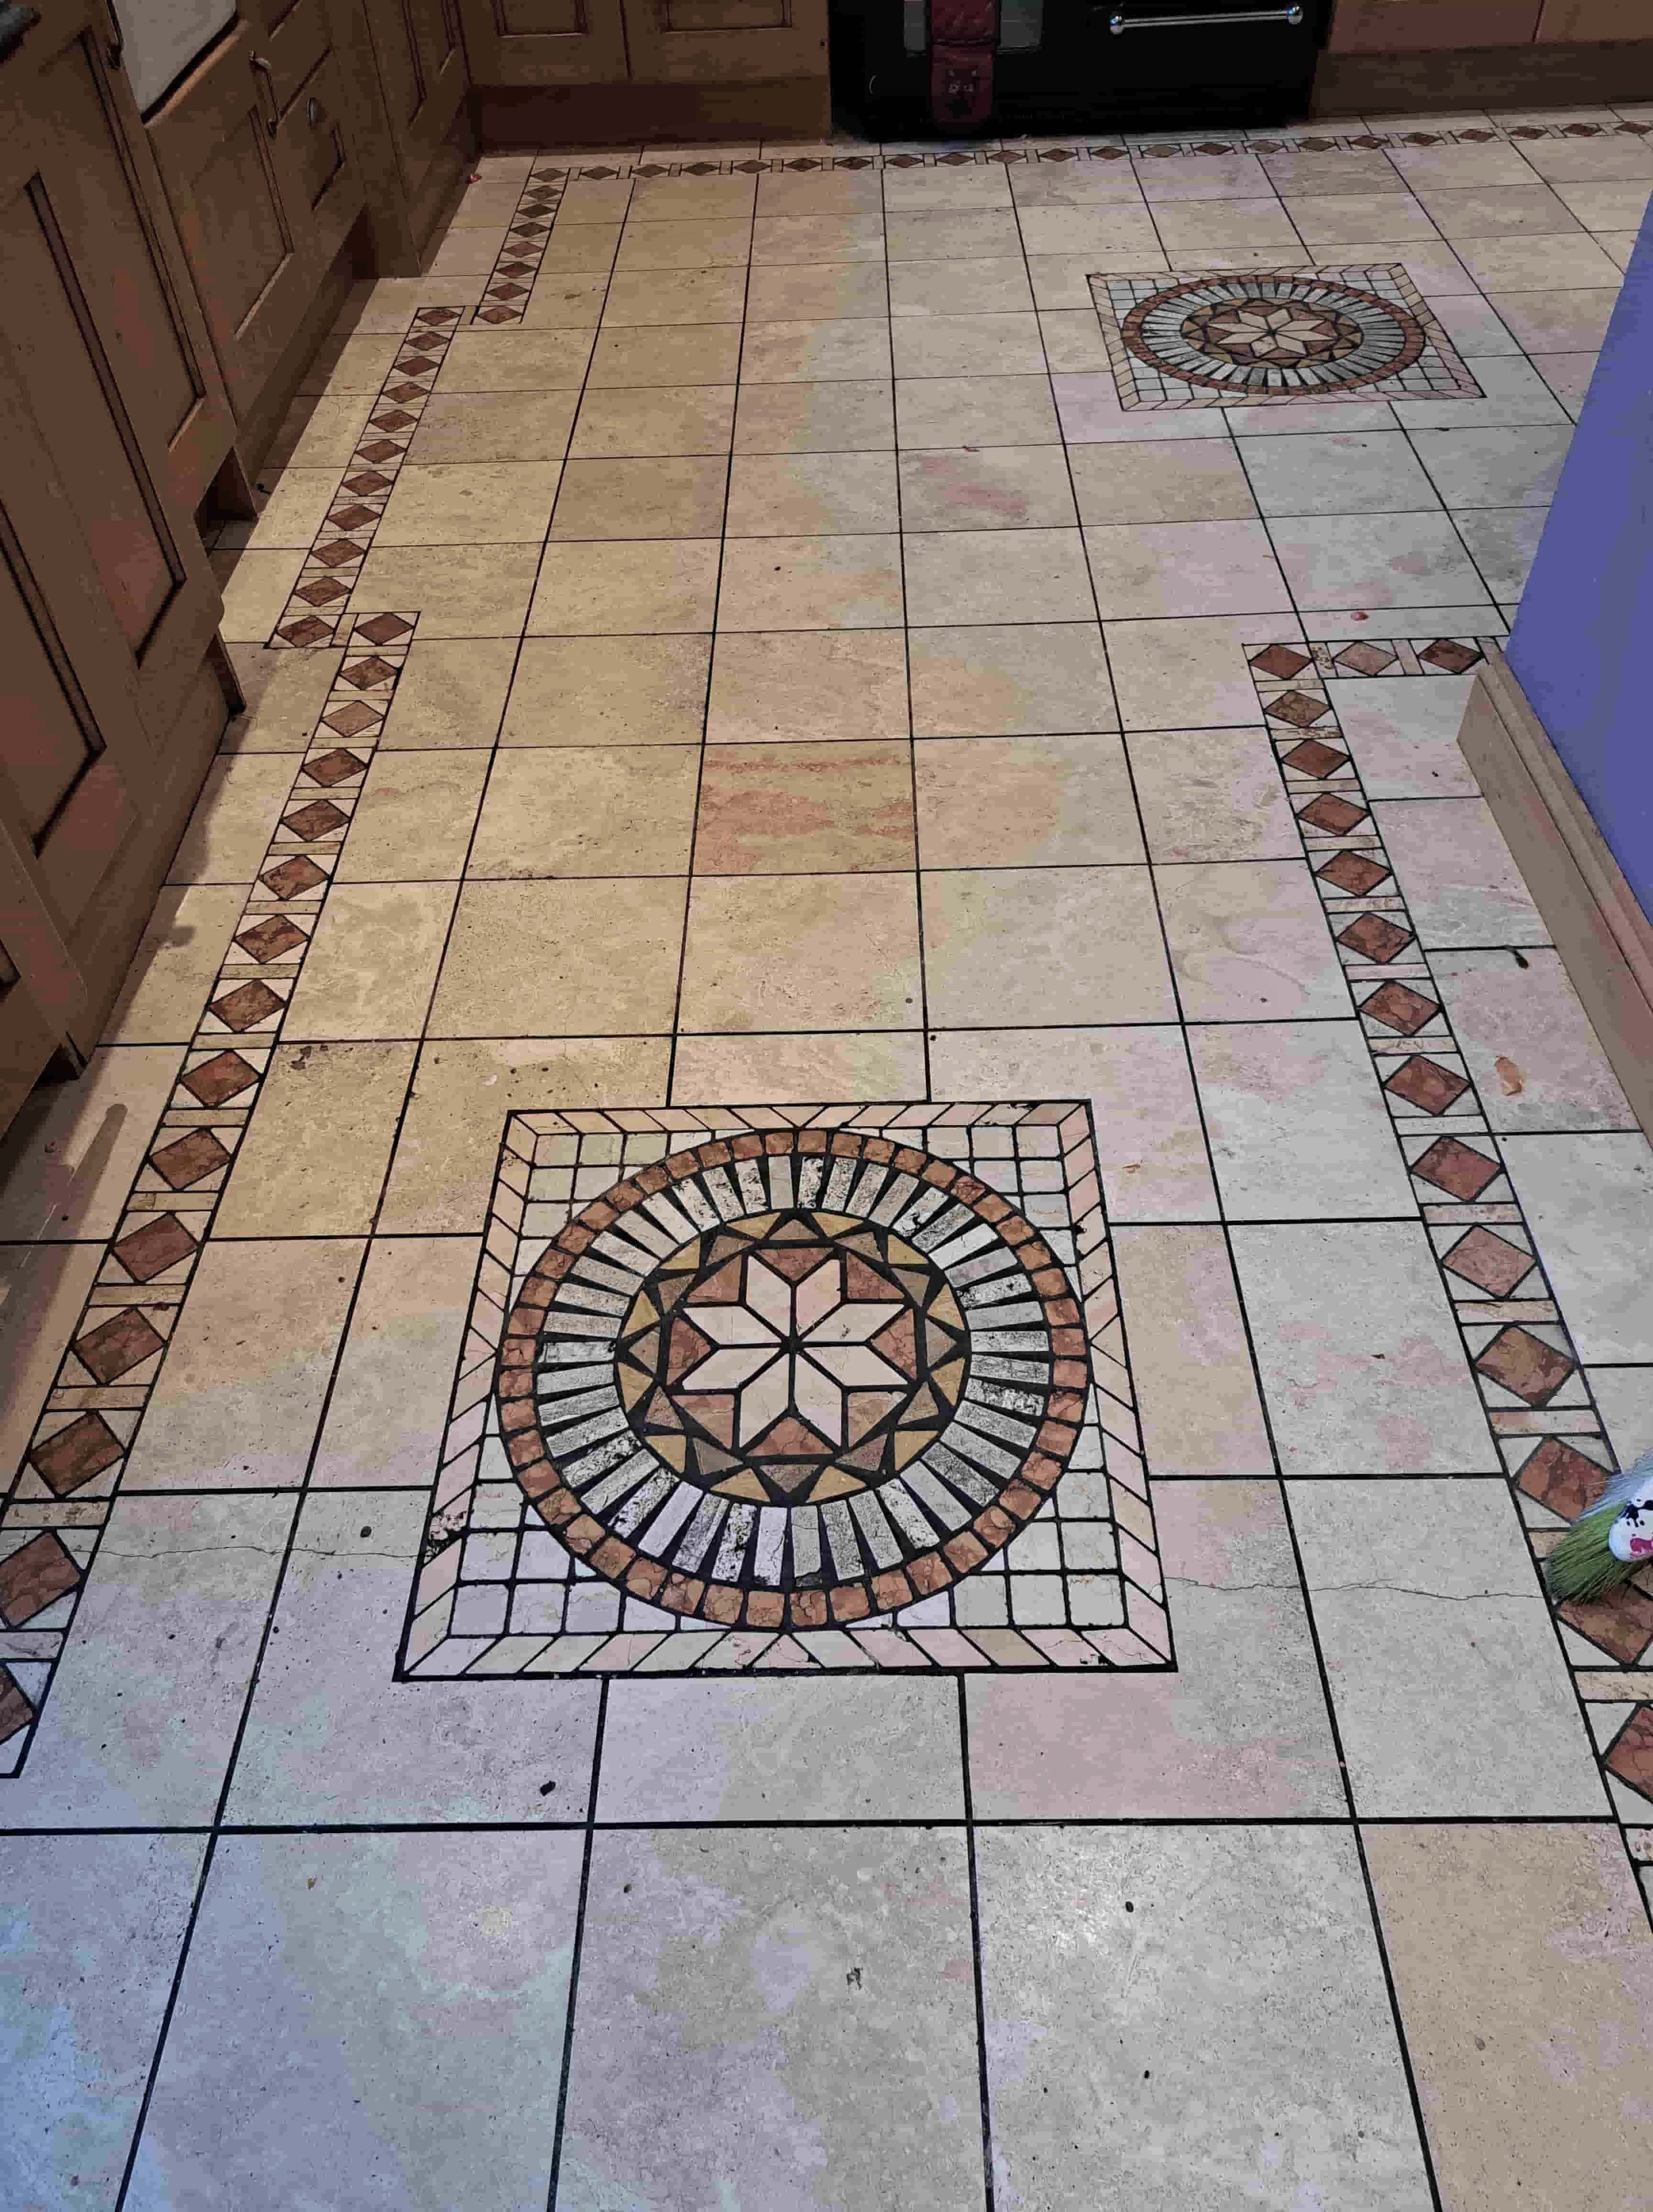
My client from Wolverhampton got in touch with me about their large Travertine tiled floor, which was installed throughout the kitchen and dining room and needed renovation. The floor also a included a couple of patterned feature areas laid with Limestone also needed attention. Interestingly a friend of mine had sold the house to the client so I knew the house quite well.

Travertine Tiled Floor Before Cleaning Wolverhampton

I went over to the property to conduct a survey of the tiles to see what needed to be done. During that visit I conducted a cleaning test to understand which treatment would be the most effective solution and this allowed me to create an accurate quote. The work would be carried out over two days. The client was happy with the quote and a date was scheduled for the work to begin.

Travertine Tiled Floor Before Cleaning Wolverhampton

Cleaning a Travertine Tiled Kitchen and Dining Room Floor

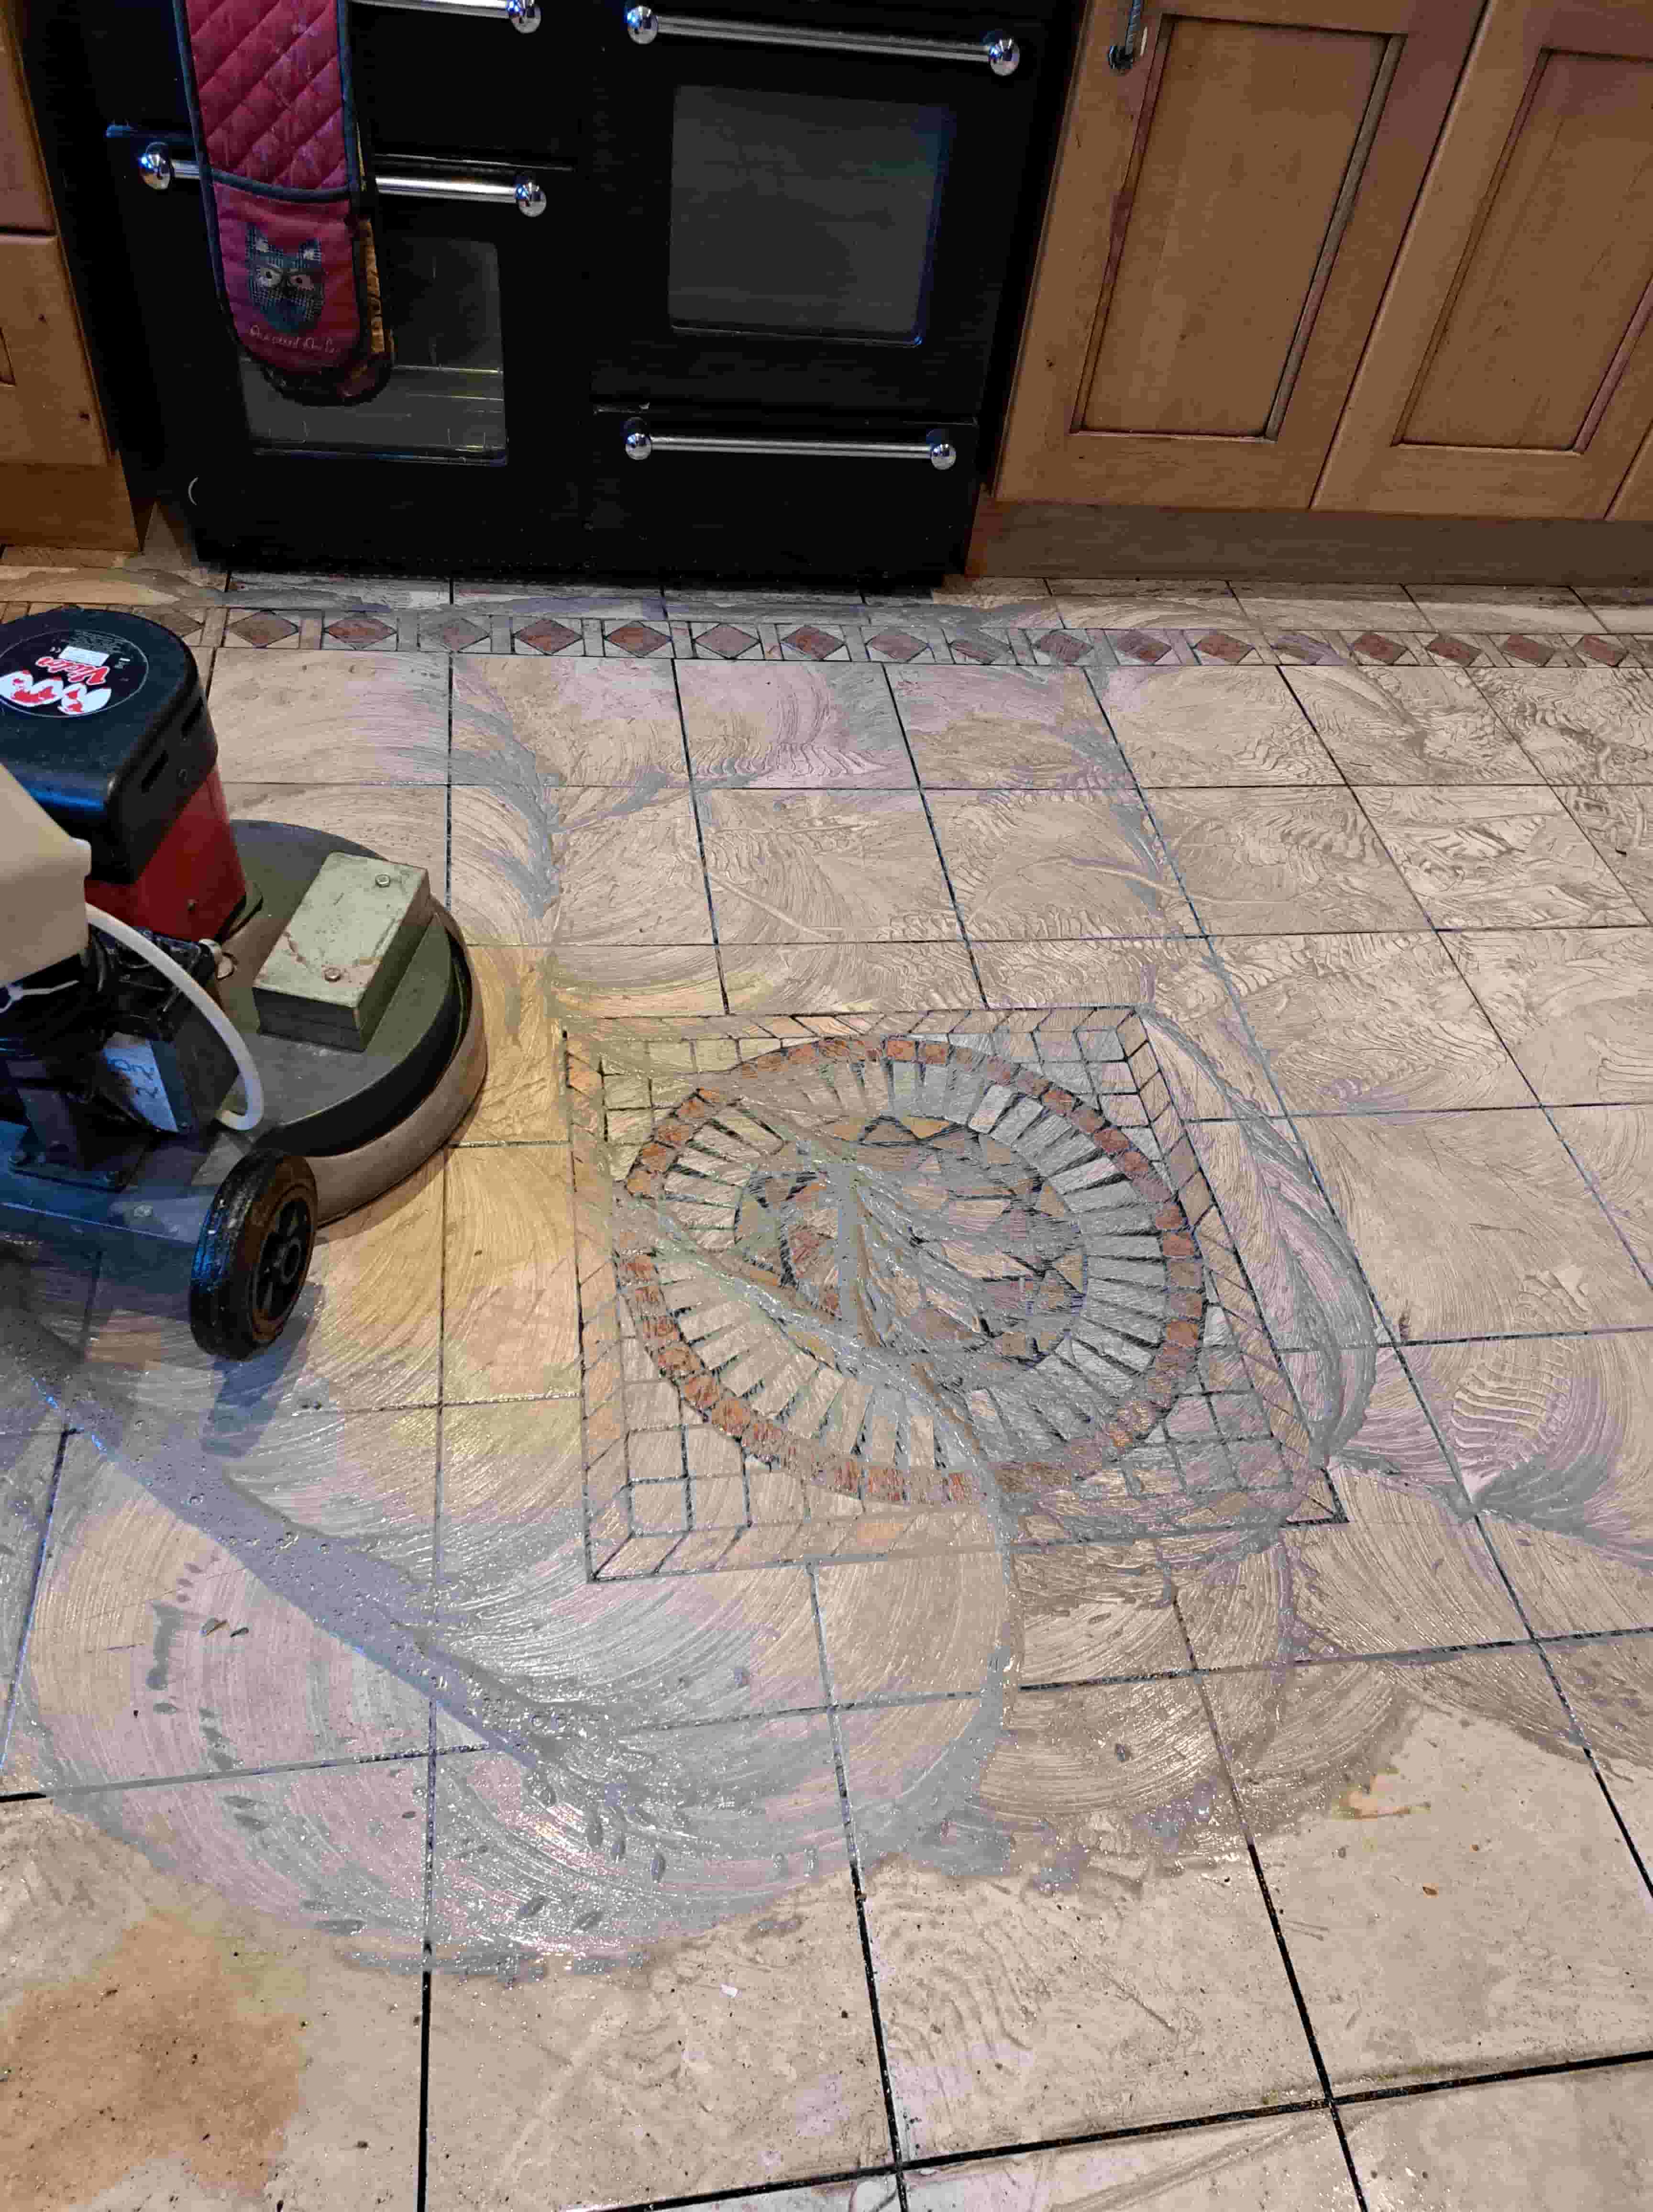
The get the Travertine clean a dilution of Tile Doctor Pro-Clean was sprayed onto the floor and allowed to dwell and soak in for ten minutes, then with a rotary machine fitted with a 240-grit silicon carbide pad I cleaned the floor. This helped get into the pitted areas and release the dirt. I also went over the grout lines with a stiff grout brush and more Pro-Clean to ensure the grout was as clean as it could be. To remove the slurry generated during the cleaning I used an air flex pro machine which is a powerful industrial pressure cleaner and vacuum.

Travertine Tiled Floor During Cleaning Wolverhampton

Next, I started the burnishing process, which meant applying diamond encrusted pads with grits ranging from 400, 800 and 1500 to the travertine, rinsing the floor between pads to remove the slurry. This process renovates the stone and brings up its polished appearance. Before leaving for the day, I did some repairs to some deep pitting and some cracks with appropriate flexible grout and allowed this along with the floor to dry overnight. To aid this I left two air movers with the client.

Travertine Tiled Floor During Cleaning Wolverhampton

Sealing a Travertine Tiled Kitchen and Dining Room Floor

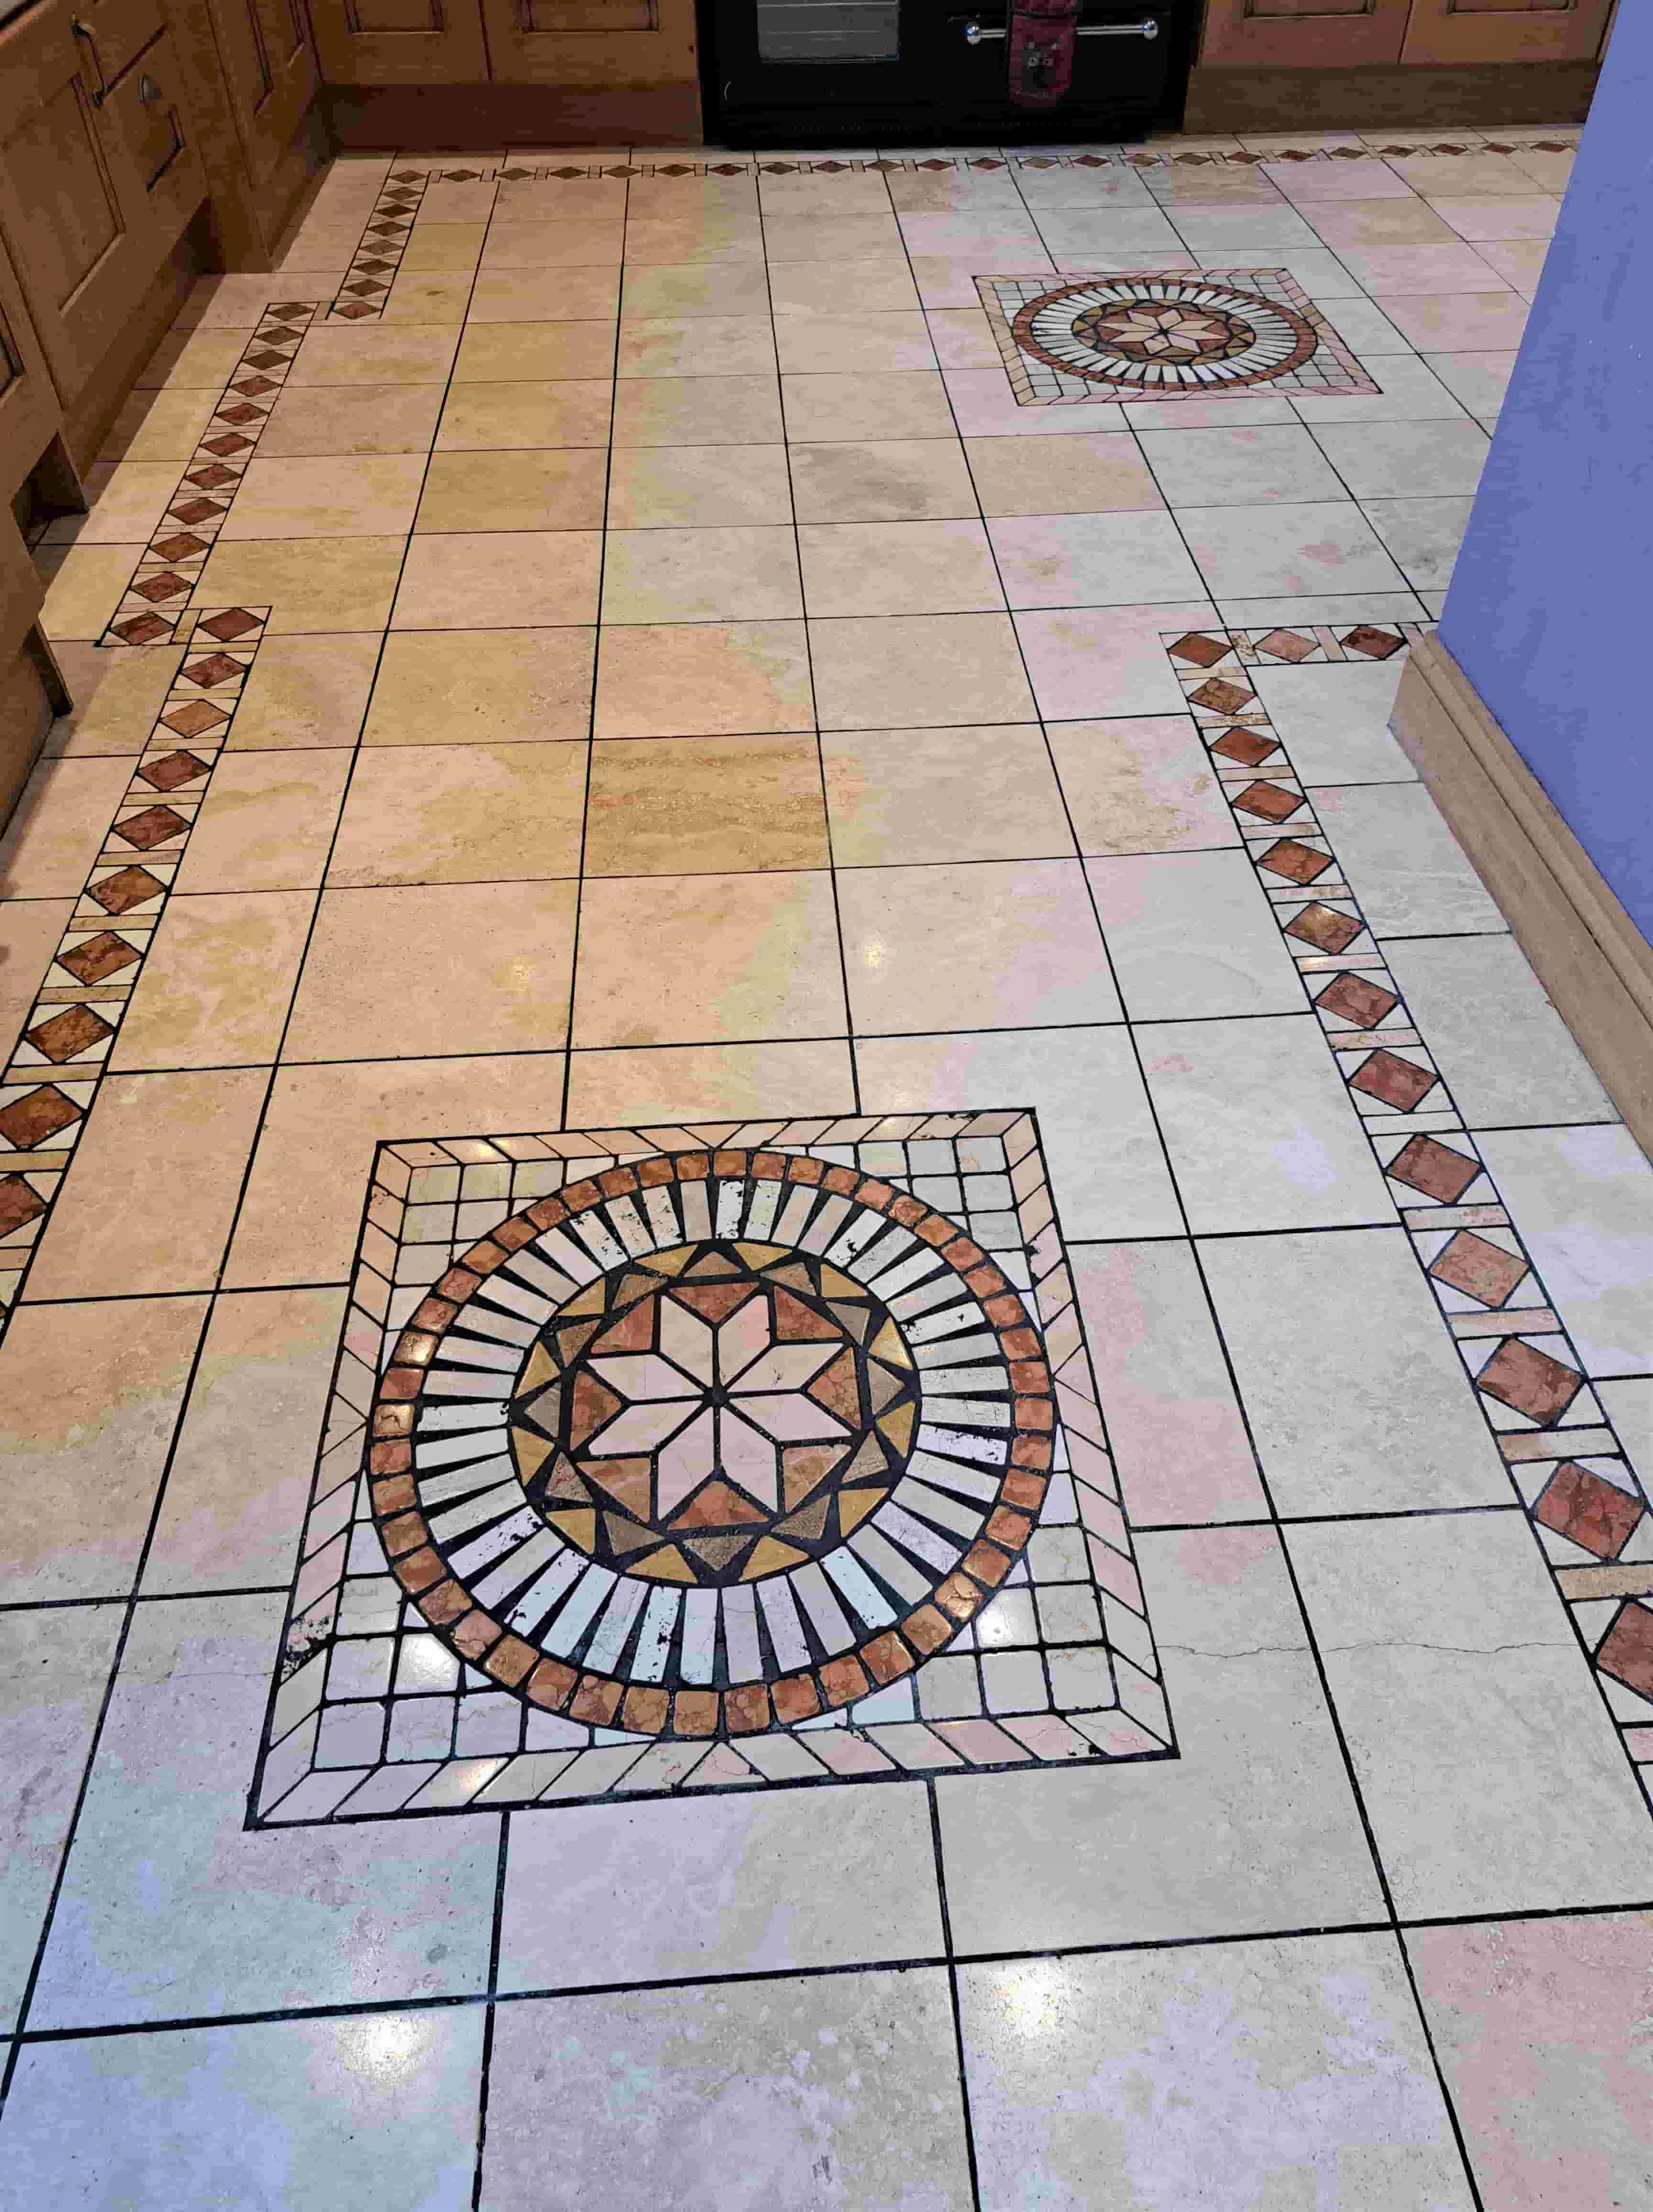
The next day I returned and went over the floor with a 3000-grit very fine burnishing pad, this added a natural sheen to the stone and removed any excess grout from the repairs I had made. To finish off the floor I sealed it with three coats of Tile Doctor Colour Grow which as well as adding protection to the floor also enhances the natural colours in the Travertine. Finally, I buffed the floor with a white pad to give it the best finish.

Travertine Tiled Floor After Cleaning Polishing Wolverhampton

I advised the client on how to maintain the appearance and left a bottle of Tile Doctor pH Neutral Cleaner with them to clean the floor going forward, this is a mild cleaner and will keep the floor in great condition and ensure that the newly applied seal stays intact. My client was very happy with the work we had carried out and the overall finish.

Travertine Tiled Floor After Cleaning Polishing Wolverhampton


Professional Restoration of Travertine Tiled Floors in Birmingham

Travertine Kitchen Floor Cleaned and Polished in Wolverhampton Read More »

Edwardian Tiled Hallway Floor Restoration Bearwood

Laminate Covered Edwardian Hallway Floor Restoration in Bearwood

The customer from Bearwood, near Smethwick had recently moved in and during renovations discovered an original 100-year-old Edwardian tiled floor in the hallway which had covered under laminate. They were planning some structural changes to the hallway involving a new stud wall but decided to investigate having the tiled floor restored first and were keen to know if anything could be done to improve its condition.

Edwardian Tiled Floor Before Restoration Bearwood Edwardian Tiled Floor Before Restoration Bearwood

I visited the property to Survey the floor and could see given its age the floor was in good physical condition although there was a small amount of cracked tiles. Fortunately, laminate flooring is laid as a floating floor so there were no glue or screw holes to deal with. The Vestibule area however was in a worse state and had been covered in all sorts of cement screed, adhesive, grout, and God knows what.

Confident I could resolve the problems I worked out a quote which was accepted and a date was set for the work to begin.

Cleaning and Repairing a Victorian Tiled Hallway

The first day was used to make repairs to the floor, in one of the corners the floor was sloping away and had some sort of silicon filler installed where tiles had once been. After resolving the sub floor problems, I managed to level it out and used matching replacement tiles to complete this and a couple of other repairs.

Edwardian Tiled Floor During Restoration Bearwood

This left the vestibule part of the floor which as mentioned earlier was in a quite a state. To remove the mess, it took a day of scraping using several Tile Doctor products including Grout Clean-up, Acid Gel, a steamer and a lot of effort.

Edwardian Tiled Floor During Restoration Bearwood

Once complete I moved onto the cleaning by spraying Tile Doctor Remove and Go onto the tiles and then scrubbing it in with a Silicon Carbide pad fitted to a weighted rotary floor machine. The floor was then rinsed with water and the soil extracted using a wet vacuum.

Old floors like this example were laid before the invention of damp proof membranes and so you can get a lot of moisture rising through the tiles. This can lead to efflorescence as the moisture evaporates at the surface. To counter this problem the whole floor was treated to an acid rinse using more Acid Gel scrubbed in with a 400-grit burnishing pad.

The floor was then rinsed, towel dried off and air movers put in place for an hour to help dry it out. Then before finishing for the day, I applied a coat of Tile Doctor Stone Oil to help bring the colour through in the tiles. I also left the air movers to run for a few hours to help dry the floor out.

Sealing a Victorian Tiled Hallway Floor

I returned the next day to seal the floor however when I tested to moisture reading beforehand, I found the reading to be higher than expected and after cleaning and drying the floor there were still traces of moisture. Because of this I recommended that we seal the floor using a fully breathable sealer that could cope with any excess moisture.

Happy to go with my advice the floor was sealed using two coats of Tile Doctor X-Tra seal allowing each coat to dry for thirty minutes before applying the next. X-Tra can be used internally and externally and provides excellent protection so was well suited. After drying I polished the floor with a very fine 3000-grit burnishing pad to add a natural sheen to the tiles.

Edwardian Tiled Floor After Restoration Bearwood Edwardian Tiled Floor After Restoration Bearwood

I think you will agree the pictures show the transformation the floor and as you can imagine my client was very happy with the result. Before leaving I left the customer with a bottle of pH neutral cleaner to maintain the floor, we recommend using a mild cleaning product for after cleaning as it helps preserve the life of the sealer. You need to be very careful with supermarket floor cleaning products, most are bleached based and simply too strong for use on a sealed floor.

Edwardian Tiled Floor After Restoration Bearwood


Professional Restoration of a Victorian Tiled Hallway in Birmingham

Laminate Covered Edwardian Hallway Floor Restoration in Bearwood Read More »

Scroll to Top