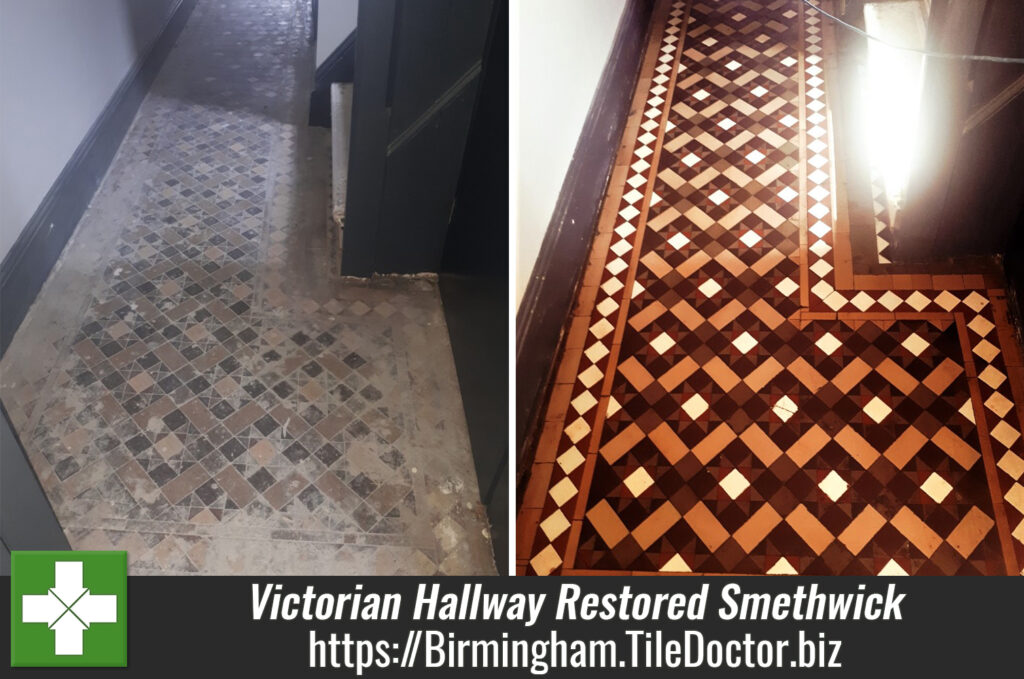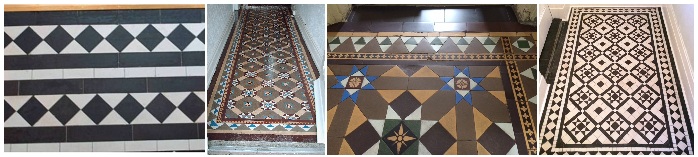
Repair and Restoration of Victorian Tiled Hallway in Walsall
The client had lived at this property in Walsall for a few years and decided that they wanted to finally sort out their Victorian hallway which needed restoration. I went over to the property to survey the floor and advised that with repairs, cleaning and sealing the process would take three days. Having worked on numerous floors like these before I was very confident that we could repair the floor where needed and restore its appearance. I provided them with a quote which was accepted and the job was booked in.
 |
 |
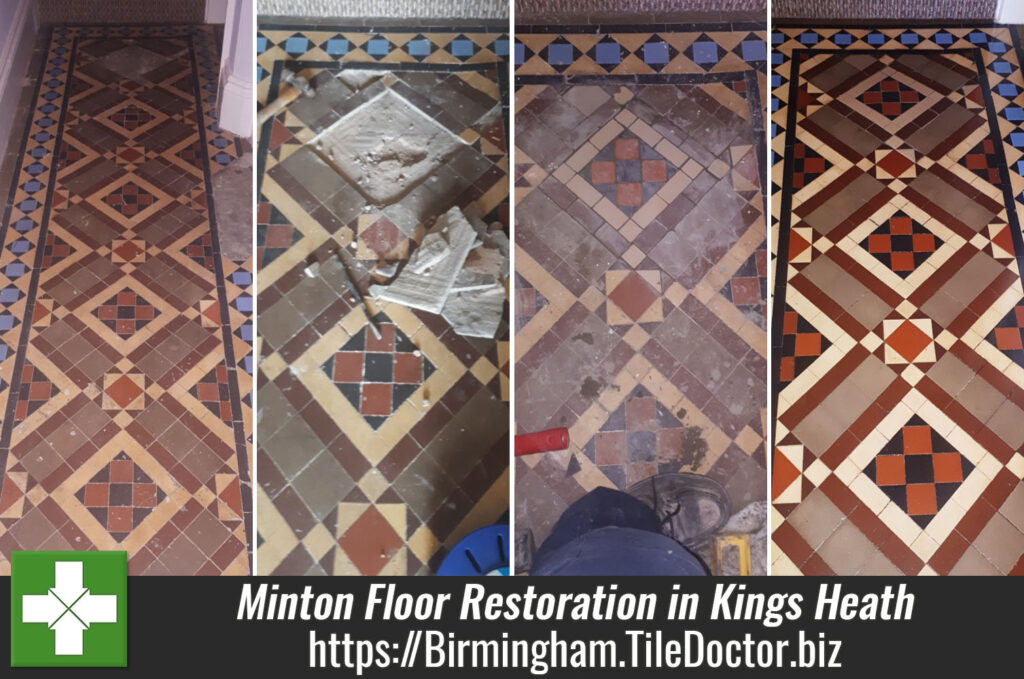
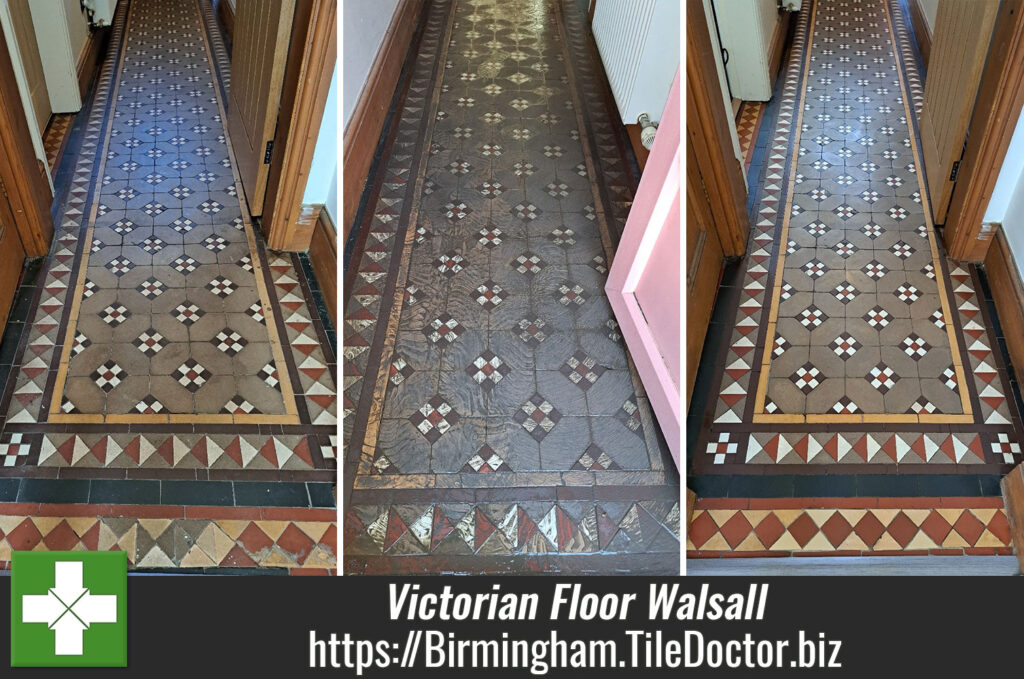
During the survey I noticed that at some point in the floors long history someone had made repairs to a couple of doorway borders with random tiles so the pattern was incorrect. I agreed to rectify this as part of the restoration.
 |
 |
Restoring a Victorian Tiled Hallway Floor
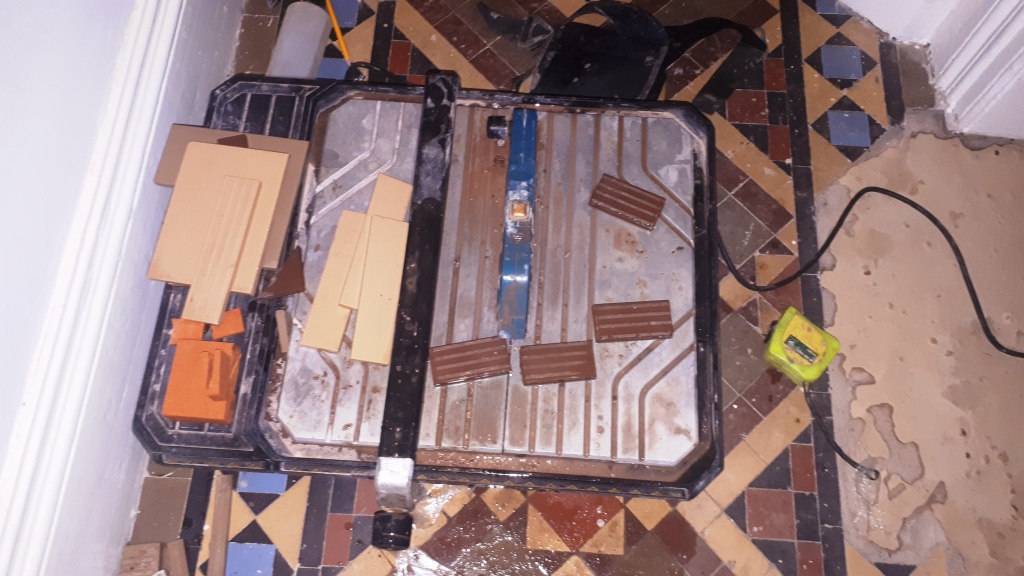
Before starting the cleaning work, it made sense to address the tiling issues so my first course of action was to prise up the tiles along the doorway borders. The tiles in these sections had to be completely removed and then the base cleaned up so they could be re-laid along with matching replacements to correct the pattern. The replica tiles I had sourced needed to be carefully cut to size to ensure a good fit with the original. After resetting the tiles and re-grouting I left them to dry overnight.
 |
 |
The next day I was able to move onto deep cleaning the floor using a mixture of Tile Doctor Remove & Go and Tile Doctor Oxy-Gel. This was allowed to dwell for 15 minutes before it was scrubbed into using a weighted rotary machine with a 120-grit carbon silicone pad. This pad is very effective and gets right into the pores of the tiles, the edges were done by hand using a 200-grit diamond block.

I then rinsed the floor with an Airflex Pro machine which applies water under high pressure to the floor and then removes it with a powerful vacuum leaving the floor clean of all soils and almost dry. Its an expensive machine but a real time saver.
I then gave the floor and acid wash to further clean up the tiles and neutralise any potential efflorescent salt issues that can be a problem with old floors like this. To do this I applied a dilution of Tile Doctor Grout Clean-Up and this time worked it in with a 400-grit burnishing pad. The floor was then rinsed as before with the Airflex Pro and I used a couple of air movers to help speed dry the floor.
Before finishing for the day I used the buffer machine one last time to burnish the floor with a 3000-grit burnishing pad to add some natural sheen. I then followed this up with the application of a coat of Tile Doctor Stone Oil, this helps bring back the colour of the tiles and I find it reduces efflorescence which can appear overnight.
Sealing a Victorian Tiled Hallway Floor
To assist with drying I asked the client to leave the air movers running during the evening and to put them back on in the morning. This worked well and by the next day I was able to seal the floor.
To seal I applied a coat of Tile Doctor X-Tra Seal which is an oil-based sealer that is fully breathable which is an important consideration when choosing a sealer for a floor that doesn’t have a damp-proof membrane. The sealer really enhanced the colour in the Victorian tiles and will give strong protection against future staining.
 |
 |
The tiles were then buffed with a White pad to remove excess sealer and further bring up its appearance. For aftercare I left the client a bottle of Tile Doctor pH Neutral Tile Cleaner to help maintain the appearance of the floor.
 |
 |
Professional Restoration of a Victorian Tiled Hallway in Birmingham
Repair and Restoration of Victorian Tiled Hallway in Walsall Read More »