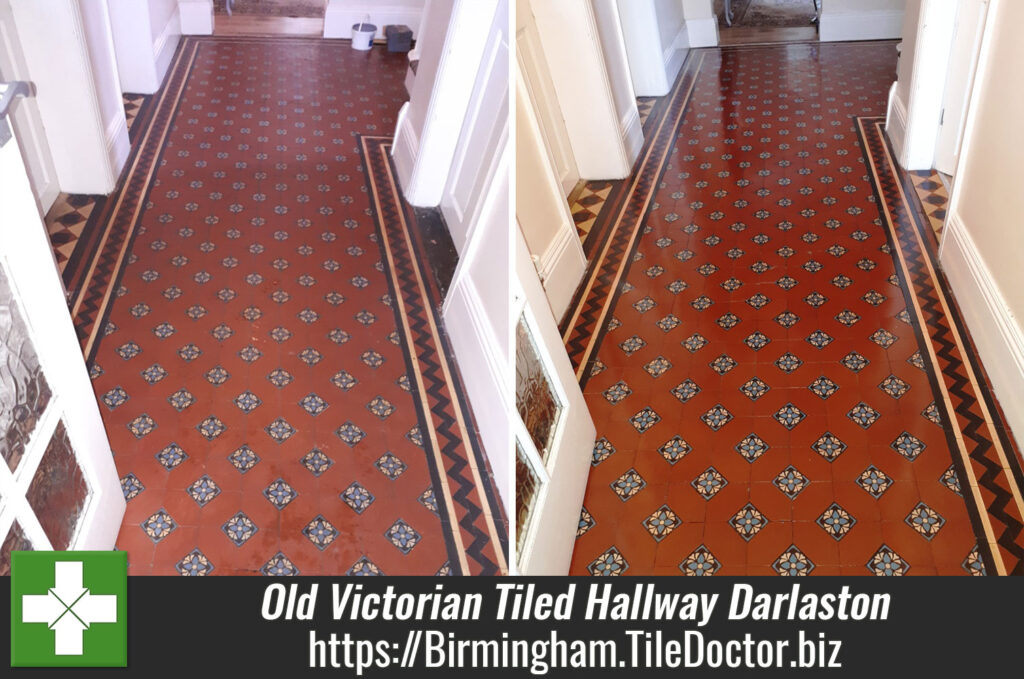
The photographs below are from a house in Darlaston near Walsall which had recently changed hands. The new owner was quite taken by the existing Victorian tiled hallway floor which unfortunately had not been maintained very well by the previous owner, undeterred by its appearance he contacted Tile Doctor to see if it could be restored.
Darlaston grew rapidly in the 19th century around the nut, bolt and gun lock manufacturing and coal mining industries with many houses being built so it’s very possible that this floor was laid when the house was built over a hundred years ago
When I visited to quote for the work it was apparent that the floor which was suffering from many broken tiles and a high percentage of loose tiles. With the customer happy for me to do the work I set about sourcing replacement tiles that were a good match for the broken ones which would need replacing.
 |
 |
Victorian tiles are still popular, so I was confident I could find new replacements or originals from one of the many salvage companies.

Repairing an Original Victorian Tiled Hallway Floor
Replacement tiles were sourced, and I went about removing the broken tiles and setting the replacements. Whilst working on these I also inspected the floor thoroughly for loose tiles and re-laid them.


 |
 |
After the tiles had set I grouted them in along with other areas that needed re-grouting. Repairs took two days in total.
Deep Cleaning an Original Victorian Tiled Hallway Floor
The next step was to give the whole tiled floor a deep clean; normally I would opt for a chemical cleaning process at this stage however with the floor being so old it was unlikely to have a damp proof membrane and I was concerned about using too much water which would take a long time to dry out. I therefore opted for scrubbing the floor with a 200-grit diamond burnishing pad fitted to a weighted rotary buffing machine and lubricated with a little water.
 |
 |
The water soon turned to a slurry as the ingrained dirt and old sealers were removed from the tiles. It’s tricky to get into the edges and corners with circular pads so once that was done the edges were finished with handheld diamond blocks. The floor was then rinsed off and the soil extracted with a wet vacuum before being covered over and allowed to dry for a couple of days.
Sealing Original Victorian Tiles
When I returned to the property the dust sheets were removed and the floor vacuumed to remove surface dust and dirt. Once that was done I started the process of sealing the tiles with Tile Doctor Seal and Go which adds a subtle sheen to the Victorian tiles that really brings the floor alive. Six coats were required to fully seal and protect the floor.
 |
 |
The customer was delighted with the results and I left them with a bottle of Neutral Tile Cleaner for use in cleaning the floor going forward. They also booked me in for 12 months’ time for a maintenance visit, so I can reapply a couple of coats of seal to keep the floor topped up and looking it’s best.


Sealers wear off with use so rather than waiting for that to happen let Tile Doctor help you keep your tiles looking their best by setting up a regular maintenance visit with your local Tile Doctor.